Over the last couple weeks, I’ve been adding several workflow improvements to Shader Foundry. Now that these improvements have been completed, I figured that it would be a good idea to take this opportunity to post some details about our shader export tool.
In short, Shader Foundry manages our shader pipeline. It serves as a simple GUI for Microsoft’s shader compiler (FXC) and provides visibility for the state of each shader asset.
We chose a very minimalistic approach for our shader asset pipeline: shaders are compiled by fxc.exe and the output is directly used by the engine. There is no additional processing involved.
Also, Sauce does not make use of the Effects framework; instead, we use individual shader source files explicitly written for one of the six shader types supported by D3D11:
- Compute Shaders
- Domain Shaders
- Geometry Shaders
- Hull Shaders
- Pixel Shaders
- Vertex Shaders
History
In the early days of implementing our Graphics library (now officially referred to as Graphics 1.0), Alex created a simple tool to scan our Art/ directory and compile the shaders.
Some months later, it turned out that we needed a similar interface for our mesh exporter. At that point, we decided to create a unified Pipeline tool that incorporated both the shader compiler and the mesh exporter, with the intention that as new asset types came online, we would integrate them into the established framework.
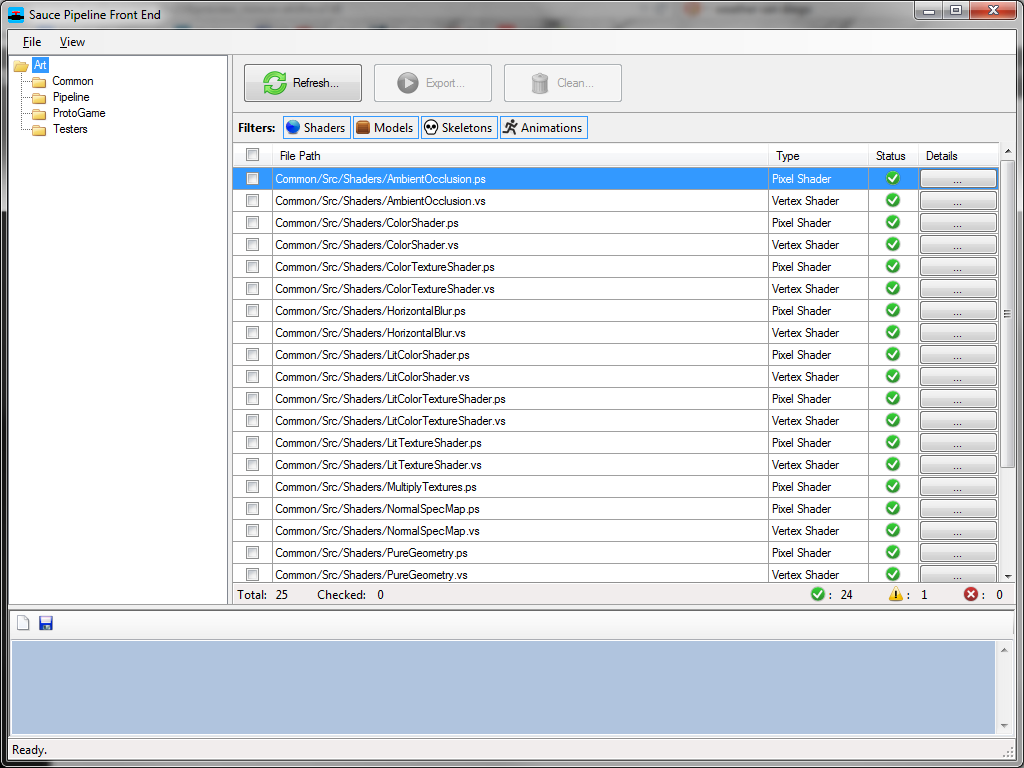
The Pipeline user interface featured a file tree, an asset grid, and a single tool bar with buttons to refresh, export, and clean assets. As you might expect, this unification of the UI also included a unification of the data model.
When I started working on Graphics 2.0 (Spring 2016), I took the opportunity to reverse course on the unified pipeline framework. After a couple years of fairly regular use, it had become clear that while the Pipeline tool did make strides in the right direction in terms of its user interface, there were many shader export specific improvements that were being stifled by the unification requirement.
Furthermore, I had the feeling that the Pipeline tool had come to a crossroads: either continue to expand and eventually become a full-blown asset editor, or split into smaller, domain focused tools. It’s probably obvious at this point that I chose the latter. My reasoning was that I definitely didn’t need an all-encompassing asset suite, especially when I was just starting a complete overhaul my rendering engine. It would have become more of a distraction from what I was primarily trying to accomplish: Graphics 2.0. I was looking for less speed bumps and detours, not more.
An Old Idea Made New
Shader Foundry started off as a stripped-down version of the Pipeline tool. The directory tree with a corresponding asset grid was a great foundation for the user interface. From there it grew to support all six shader types (Graphics 1.0 only supported vertex and pixel shaders, so the tools followed likewise).
Filters Bar
To be honest, the explosion in the number of shader types was another argument in favor of extracting the shader exporter back into a standalone tool. Since the Pipeline tool was designed to operate on any asset type (shader, mesh, animation, …), it required filters for each of those types to cater to the common workflow.
![]()
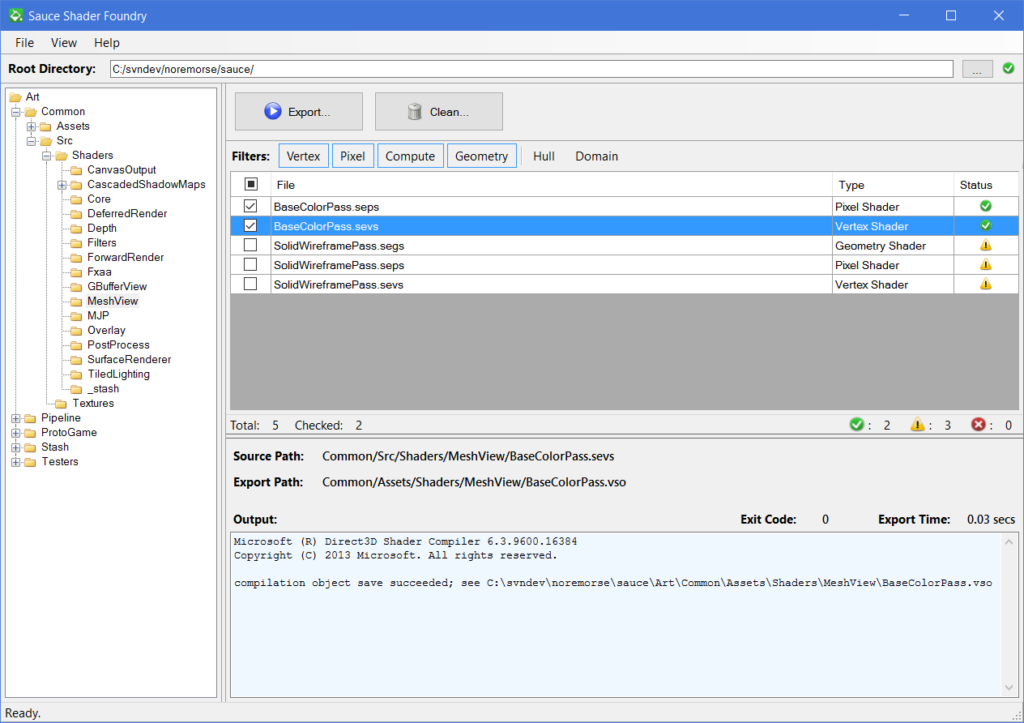
However, there was no way to filter on any of the asset “sub-types” (ex: vertex shaders vs pixel shaders). I experimented with ways to do this in the unified framework, but they were all complex and felt over-engineered. As such, when I extracted the UI from the Pipeline tool, the “Filters” bar was repopulated with toggle buttons for each of the different shader types.
![]()
File Monitoring
In the Pipeline tool, if you made a change to a source file or perhaps deleted an asset file, you needed to manually refresh the interface to reevaluate the files and update their status. That’s what that big “Refresh” button was all about.
One of my goals in Shader Foundry was to remove workflow friction. In this case, I was able to completely eliminate the “Refresh” button altogether. Instead, the tool actively monitors the shader source files and their dependencies. If a shader source file is changed, or a corresponding asset file is removed, it immediately flags the asset as “out of date”.
I should point out that the shaders used for Graphics 1.0 were pretty simple and all self-contained. However, the shaders in Graphics 2.0 include other common source code which, in turn, may also include other common source code. Consequently, if a common include file is modified, the status for all dependent shaders is updated accordingly.
As you might imagine, this facilitates a much better user experience than mechanically having to click the “Refresh” button after any change to shaders or common include files.
Asset Details
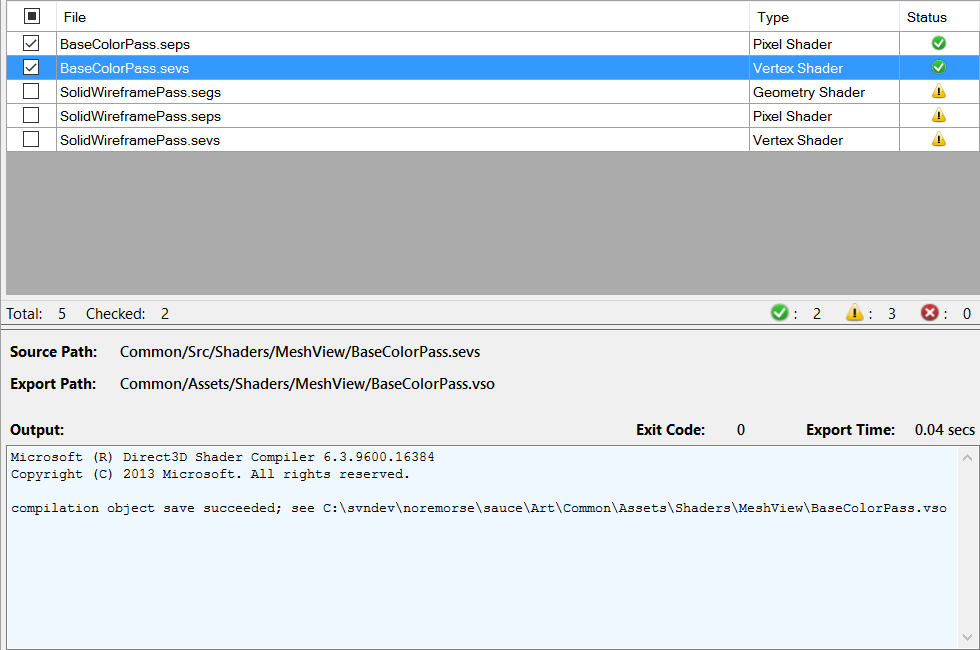
Another issue with the workflow in the Pipeline tool was the additional layer of indirection required to investigate shader compilation errors. If there was an error, even though the status would get changed immediately, the only way to inspect the error was to click a button to open a dialog with the FXC output. Doing this once in a while is mildly annoying… doing this as a means of shader debugging is downright painful.
In Shader Foundry, I moved the Asset Details panel from a separate dialog and placed it below the Asset Grid. This way, the user can select an entry in the grid and the Asset Details can immediately display the corresponding data. While it might not seem like much of a change, it actually makes a huge difference in iteration time.
Settings Dialog
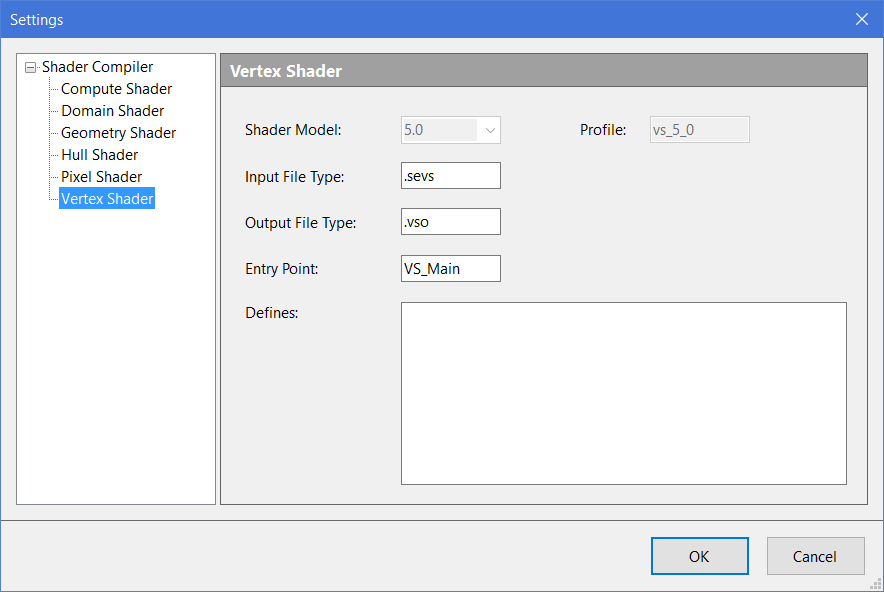
The Settings dialog for the Pipeline tool was embarrassingly bare. There was a General tab where the Root Directory was set, and then individual tabs for the shader exporter and the mesh exporter, each with a single path loader control for their corresponding external executables.
When it came to setting up Shader Foundry, I knew that I wanted to expose a few of the FXC options. I decided to model the Settings dialog on the Visual Studio Options dialog. In this case, I built a base Master-Detail control that can be reused for other tools.
About Dialog
Lastly, I added an About dialog. This was really just for fun, and it turned out to be really cool!
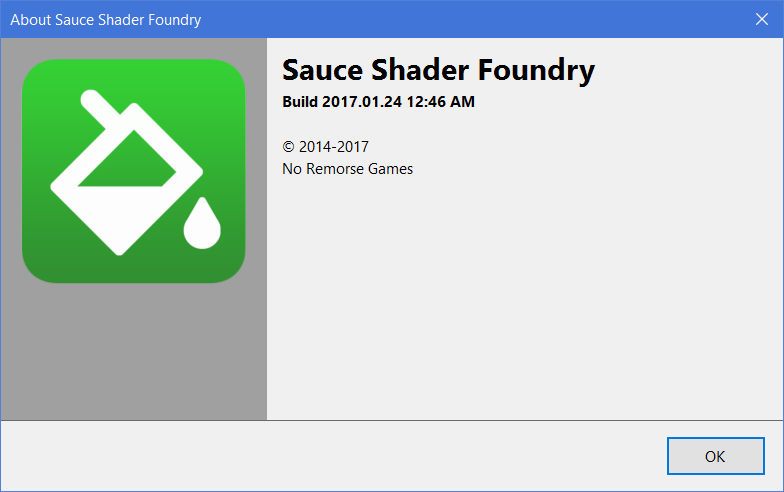
The main idea was to create an About dialog that was reusable for all of the tools. The image and the data all needed to come from the application with minimal setup. As such, I created an About form based on the AboutBox template, which uses the AssemblyInfo to populate the text. The image is extracted from the executable icon and displayed inside a field of gray. I think it looks pretty sharp.
Final Thoughts
I’m sure there will be plenty more to do down the road as I continue to use it, but I think that Shader Foundry is a much improved version over the Pipeline shader exporter. That said, here’s a couple of points to takeaway from this venture.
Let Experience Drive: Don’t be afraid to reverse course on a decision — you are not starting from scratch even if you decide to start over. Take heed of the lessons you’ve learned from the current version and make something better.
Complexity Breeds Complexity: Steer clear of piling on layers of architecture to force one set of things to work along side another in the name of a “unified” framework. Architecture requires time to put into place and converts assumptions into pillars. Whenever possible, keep the architecture lean so that you can be responsive to change.